Saturday, April 25, 2009

Deathwatch Movie Stars

Today I wanted to get a post out about my most recent endeavor. The Movie Marines. This is a completely illegal, unapproved, and probably broken army list that was published in US WD300. The idea is to make space marines as tough as they should be based on the books and movies. Now, to be fair, any space marine that is as powerful as the books make them is probably too powerful for normal games, but in Apocalypse, anything goes.

This idea is my basis for creating these super marines. I wanted something fun to have if I play in any Apocalypse games. These guys should easily fit the bill.

Now for the design. The Movie Marine list expects the following units:
1 Space Marine Sergeant (bolt pistol, chainsword, and grenades)
0-1 Space Marine Dude (bolter and grenades)
0-6 Space Marines (bolter and grenades)
0-1 Space Marine with Flamer (flamer and grenades)
0-1 Space Marine with Missile Launcher (missile launcher and grenades)
0-1 Rhino or Razorback

So basically, I need 10 Marines and their transport, but, as these are no ordinary marines, I felt it necessary to make these bigger than standard. This is where I happened upon multiple articles about making 'truescale' marines. This is a technique of using different parts, greenstuff and a lot of ingenuity to create marines that are bigger than normal.

So far I have been able to 'complete' two of my models. Here they are for your review.


The basis for my marines are terminator legs, front torsos, and arms. Added to these are standard marine backs, packs and weapons. Last there is a lot of greenstuff work to fill out the terminator legs and arms.

Additionally, I chose to be a bit more creative with my weapon selections. Since the Movie Marine weapons are much more powerful than their normal counterparts, I chose to use larger weapons to help show the stronger nature. As such, the Sergeants bolt pistol was replaced by a modified single barrel stormbolter, the chainsword switched with a chainfist, and bolters swapped with marine heavy bolters.


Here is my customized banner pole for my Sergeant. I added the Deathwatch logo to the banner using greenstuff and a skull bit.


One other cool effect I chose to use are the Cinematic Effects by Armourcast. These are cool little ways to create that extra special look for key characters. As my movie marines are all special, most will likely include these additional effects.

So the above shots show a number of angles of the Sergeant. Originally, I had edged the shoulder pads, but the plastic kept cracking, so I decided to remove this. I may go back and add greenstuff for the ridge detail, but I haven't decided if I want to take on that effort. My greenstuff skills are not the best.

Here is my first marine with bolter. I am not sure if he will be a normal guy, or my Dude, but he at least is completed. This was a lot more effort as I had to completely remake his arms with greenstuff.


Last I wanted to give a shot of these guys with a regular space marine. I have chosen an AoBR marine to help show the scale difference in my new truescale marines versus the normal marines.


So, now I am interested in every ones opinion. Do these look good? Am I going overboard with the heavy bolters in place of bolters? Should I do the heavy bolters but eliminate the backpacks and ammo feeds? Please let me know your thoughts.

Thursday, February 26, 2009

Batrep: 2nd Annual LotR Independant GT (Mesa, AZ)

Hello everyone,

Well, it has been nearly a week since the dust has settled from the GitD event. I know you are all wondering how well I did, well let me go over each round first.

The event was held at Empire Games in Mesa, AZ. This was a awesome venue. There was lots, and I really mean LOTS, of space for gaming. Also the store was stocked full of merchandise. This was a welcome sight as many of the game stores I have been to locally have been a bit lacking in product. Anyway, there were plenty of Gaming tables and the tables were solidly built at standing height, although some had a few issues.

So, my list for the GitD event was an expansion of my November Primer list. It was also the same army I played against Dragi, Dean and Tim in December and January, so I had been getting a little experience with the army and its good parts and bad parts.

First my list:
Dol Amroth Fiefdoms

Imrahil Prince of Dol Amroth(Mounted)
7x Knights of Dol Amroth(Mounted)
12x Knights of Dol Amroth(Foot)
8 Men-at-arms of Dol Amroth
4 Axemen of Lossarnache
12 Rangers of Gondor

Total Models:44
Bows: 12

The GT had 5 rounds; Bilbo’s Treasure, Light the Beacons, Look to the East, The Artifact, and The Last Alliance. Basically these boiled down to 3 pitched battles, a modified Capture the Prize, and a To the Death.

Game 1 (Bilbo’s Treasure) - Opponent Frank Brown

Yes, that Frank Brown. The winner of the last years Tournament Circuit. The one who came last year and took best overall at the first GitD. That Frank Brown. Yes, I shuddered when I found out who I was up against.

Dol Amroth versus Gondor(Led by Boromir, Baragond, and I think Cirion). This was a tough matchup and a tough game overall. We squared off across a Realm of Battle table that was modeled to have a large hill in the center which also had a ruin of some sort on top. The main objective was kill the enemy army, however the secondary objective was to find ‘Bilbos Treasure’. Across the table were 6 burial sites that could contain the treasure. At the beginning of the game we rolled a D6 which would identify which pile was correct, but we have to dig the pile up to find out. The game started out with both Frank and I racing our armies forward and I was lucky to have a slightly easier path to 4 of the 6 treasures. Unfortunately, none of them had the treasure and Frank was able to find its location first. The mission allowed Frank to take the treasure to any board edge, which his was still closest so he started making for that edge while I engaged his main line on both sides of the ruin.

Imrahil showed his strength here as his banner ability helped sustain my line to allow my side more winning fights, and also he held his ground against a attack by Boromir and his pile of Might. In the end however, Imrahil was still standing and the treasure was still on the board when time was called

Outcome: Draw(10 pts)

Game 2 (Light the Beacons) - Opponent Howard Beam

Dol Amroth version Last Alliance Elves and Numenorians. Howards Elves and Numenorian army was awesome to see. His painting is truly top notch! Anyway, the objective of the mission was to light as many beacons as possible and then eliminate the opposing army. Setup saw me take advantage of my side, while limiting Howard’s options to only 2 paths around impassible water.

Unfortunately, I was unable to capitalize on this as I moved my Knights incorrectly by forest, not knowing that they cannot charge in the trees. Oops. Bad move and probably cost me the game. This had the effect of eliminating Imrahil from being a benefit as he was out of position the entire game. I was able to light 5 of the beacons though gaining me 2.5 additional bonus points.

Outcome: Draw(10 pts + 2.5 Bonus Points).

Game 3 (Look to the East) - Opponent Andrey Zubkov

This was an interesting game. We were on the Mirkwood forest table which had lots of trees and difficult terrain scattered across the entire table. The missing called for us to deploy half our models and keep the other half in reserve as they would enter the ‘east’ board edge during play. East is relative as it was really from the right for each player. For this I tried using my right side of the table to help keep my models together and thought I had done well as when I got my reserves to enter Andrey was about a third of the way across the table and was still missing his reserves. I decided (incorrectly) to deploy Imrahil and my mounted Knights behind Andrey’s line in a hope to engage and squash them. Unfortunately, his Moronon Orcs were tougher than I thought and my attacks broke like the ocean against the beach. His wraith transfixed or compelled Imrahil for 5 straight rounds (3 of which he was attacked) but Imrahil held his own through seriously lucky rolls. That can’t be said for the rest of my models though and when time was called and the math added up, I was 8 point past the cut for a draw.

Outcome: Minor Loss(7 pts)

Game 4 (The Artifact) - Opponent Robert Brightwell

So I had played Rob before in the past and had seen a prior iteration of his Angmar list at the last GitD. Rob did make changes, including the addition of wild wargs and a shade. Overall this mission was a good matchup. The mission was to collect the Artifact from the center of the table and then carry it off the opponent’s table edge. The artifact could be carried by any model (mounted or foot) but could only be dug up by models on foot.

Well, I was able to run for the artifact and extract it prior to Rob getting his orcs to me but then the real game started as I tried to figure out a way around or through his defensive line. At first I thought I could take the artifact off his left side(where his wargs had deployed) as my knights had done well in the prior round engaging them, unfortunately as I committed my knight to the direction my dice failed me as the next round saw nearly every knight gone and the wargs in the free. I think the major factor in this however was the shade with its Fight lowering ability. Man does that hurt!

Well, I had to change my knights’ direction and by this time I had caused Robs rights side to collapse back on it leaving a nice path to freedom. This is the direction I took and eventually won just prior to time being called (I think it was like 2 minutes)

Outcome: Major Victory(20 pts)

Game 5 (The Last Alliance) - Opponent Keith Hruska

Dol Amroth against Dol Amroth on the Osgiliath table. This was a tough match that really only had a chance to end in a draw. Considering the terrain and the matchup of models it devolved into a simply pushing match as he pushed me one round and I pushed back the next. We both lost very few models this entire game.

Highlight was 6 Rangers of Gondor holding up all of Keith’s Knights the entire game, effectively eliminating them from any concerns.

Outcome: Draw(10 pts)

In all, I was 11th out of the 20 players. I had a great time and Tim and Dean put on another great LotR tournament!

Tuesday, February 17, 2009

Round Robin (Tom Bombadil)

So the guys over at AWC came up with this cool experiment called the Round Robin Painting Event. The idea was that each painter would select a single 25mm based model and assign 1 of 4 tasks to various painters and then ship the model off. Each painter would complete his/her task and then mail the model to the next person in line.

Well, the first of those models has finally made it to me for basing work. But before I go over what I did, let us take a look at the model throughout the process. Remember that at each step the model was painted by a new painter and so the overall result is a collaborative effort.

First Lets identify the model owner and selected painters.

BrentS decided to do Tom Bombadil.

His selected painters are:
Basecoat: BostonNazgul
Details: Knitemare
Washes/Hightlights: Mouth of Sauron
Basing: JLong05


Now I do not have a primed picture, but I assume he was all black. Below are the pictures after BostonNazgul had completed the base coat colors on good old Tom.


Details were completed by Knitemare, but alas pictures were unavailable, I believe the forces of Mordor somehow caused a failure in the photo process, rendering any pictures at that time un-viewable. Sad really as Tom really did look good after his details had been completed.

Next up was Mouth of Sauron(aka Smeagol) who worked next on completing highlights and shading. Here are the completed shots of Tom after his highlighting was done.


Last was myself(jlong05). I had the final job of basing the model. As I had a blank slate I really spent some time thinking over the 'best' look for a base. Taking into account Tom and his surrounding, I just got this feeling of fields of grass with some occasional stones. In fact the pose is almost as if Tom is pondering how to clear his grassy field. Anyway, this ended up making my decision and so after applying a base of Ceramic Stucco and painting it browns for earth tones I then added the slate for rocks. Last I added static grass to the entire base to give the effect of Tom standing in the middle of his grassy field.

Here are some additional shots of the final model.


So tell me what you all think. I know this wasn't done completely by me, but what do you think of the idea of multiple painters/modelers collaborating of a model to create a single finished product? For me it was fun. Stay tuned as additional models I am involved with show up and I detail their travels and process.

Saturday, February 14, 2009

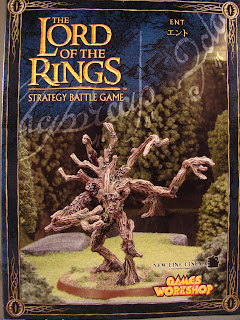
Red Dragon(Final) - Ent


Yeah.

I was able to find magnetic paint and so was able to finish my display base for my Red Dragon Entry. Basically it is some ornate wood rounds that I glued and nailed together. After sanding them smooth and then applying a magnetic paint primer(Basically it is paint with iron particles included) I was able to complete the black top coat for a finished look. So I am now officially ready for the 2nd annual Gathering in the Desert.

Friday, February 13, 2009

Red Dragon(Part 4) Base Completed

Oh my heck. I received a pile of comments on multiple sites for this model and I want to say Thank You to everyone who gave me suggestions and comments. Your input was greatly appreciated.

As I received such an outpouring of comments, I felt it necessary to use their recommendations and expand on the basing that I had done. I wasn't fully happy with the base previously, but with suggestions of really adding material to represent the crowded Fangorn Forest floor, I felt the need to add some additional work onto the model. I think it really does help make the model stand out even more. So again. Thanks for the comments!

Above is the final model as a complete picture. I felt close-ups of the base alone wouldn't put the entire model in the right perspective. I also included shots of the front and back of the model's base to show the dense forest growth and the narrow paths that I envision to be part of traveling through Fangorn Forest.


So. As a final update prior to my display base being completed (Hopefully before next Friday) I hope to get your final thoughts on my entry and what you all think my chances are if this was entered into a GT painting competition. I know its always an unknown on who will enter, but in general what are the thoughts?

Thursday, February 12, 2009

Red Dragon(Part 3)

Well, it has been another two days and I have gotten a lot done. Even considering being sick most of that time. Well I did my final dry brush coat using Americana Khaki Tan paint. This gave a great final contrasting color for the edges of the tree bark.

I also wanted to get the eyes done. This was completed using a slight dab of Red with a highlight of thinned Yellow paint. This allowed the red to show through and not be over powered by the yellow color. See the close-up of the face below.


So the next step was to paint the 'bad' bark areas. This was done using a base coat of thinned Ceramcoat Charcoal with 2 highlights. The first was a dry brushing of Apple Barrel Pewter Grey and then a final highlight of a 50/50 mix of the Pewter Grey and White. This final highlight was designed to just grab the highest points of the bark area to gain a bit more definition in the contours.

I also added a 50/50 mix of Ceramcoat Green with Americana Lemon Yellow to get a Lichen/Moss color that was applied to various locations of the Ent model. I think this goes to highlight him better and lends more credence to the 'tree' look and feel.

Last I wanted to complete the base. So far I just have grass added after multiple coats of various shades of Browns. I will probably add some slate rock and give that a little highlight colors as well as I feel the base is still a little bare imho.

Here are some additional final close-ups of the leaves and bark that I painted. I think these look great and hope that the extra effort helps in the upcoming painting contest. As this will be my first ever entry into a painting competition, I think I have done a solid first time job.


So again, I ask for your thoughts on the painting and modeling of the Ent. I am very happy with the model, while I know many have expressed dislike over this model, I found it to be fun to model. In fact, I wouldn't mind picking up another model, which given the extra parts would allow me to create it plus have extra limbs for when the plastic Ents are released in the coming months.

Tuesday, February 10, 2009

Red Dragon(Part 2)

So, I got the model primed this morning before work and snapped a couple pictures. First after the issues I ran into with using 'Clear Gesso' for priming(See this previous article), I decided to get some Black Gesso from Michaels for this model. I did not want the graininess that I was seeing on the AI models. Here are some shots of the Ent goobered up. I basically used the Gesso right out of the container without thinning it. My understanding is you get better coverage without detail loss.


Eight hours later: Well its been all day and the Gesso is dried. See the shots below. As you can see there is still very good detail and it appears only a couple spots need a second touch up of Gesso. I put this into the success column.


After the touch up was dried I added a all over base coat of Delta Ceramcoat ' Burnt Umber' I felt this gives a nice dark brown base color that I can then build up from with lighter browns. Also the darker color should give me a richer color in the shadows. Hopefully we will see this in later color applications. I also used this as a base coat for the base itself. Later colors will not match though as I want a contrast between the model and its scenic base.

After the base coat was fully dried I applied a heavy dry brushing of Delta Ceramcoat 'Brown Iron Oxide'. This is the first of a few lighter shades of brown to give the wood grain nice definition.


Well. So far I think I am getting along quite well. There is nothing like having to catch up on painting and having a looming deadline coming up soon. Hopefully I will get this done and be happy with the final finished work.

Tell me what you all think. Obviously I am still early on in this effort and would welcome any comments and suggestions to help get this model to be a top notch finished product!

Monday, February 9, 2009

Not exactly a 'Red Dragon'

That's right. It's not exactly a 'Red Dragon' but it IS my Red Dragon entry. Or hopefully will be! Basically, I am getting a very late start on this, but am optimistic that I will be able to rise to the task and finish the work on my Red Dragon entry prior to the GitD event.

As this is my first attempt at a painting competition, I wanted something that wouldn't 'kill' me in my effort of painting and getting the right texture and colors. Additionally, I have done in my opinion some great stuff for terrain, and Ents are almost terrain.

So far I have completed the assembly, greenstuff and base. He IS NOT coming off that base either as I have pinned and greenstuffed him to it. He is very secure. I think I will be going with a color set that is more in the darker shades of brown and am planning to use Woodland Scenics material for foliage.

Hopefully this all come out looking good as I would really like to have a solid showing in the competition, although, having seen some of the models that will be in it the competition as well, I am probably dreaming!

Here is a final close-up of the Ent. Next update should be primed and hopefully base coated as well. Fingers Crossed.

Sunday, February 1, 2009

Fiefdoms Update - Ready for GitD

Gathering in the Desert, or GitD, is the first tournament circuit event for Lord of the Rings this year. This is a premier event drawing players literally from across the country. I have the honor to get to play in this tournament and pit my skills against the best players of the last few years in Lord of the Rings.

As such, I wanted to bring a beautifully painted army to compete against these experts and as last year I played a Grey Company army, I wanted something different this go around. Over the last few months those of you familiar with my blog has seen my Dol Amroth army grow. In November I played them(Granted a smaller force) in the primer event, and have since been able to play them a few additional times against local friends. I hope this will be a force that will provide fun and strategy to my games in the GitD tournament.

Above is a full army shot off my Fiefdoms army complete with their display case. I had fun building my display as this was my first attempt and modeling rocks from foam. I think I did an adequate job and the painting came out much better than I expected. I decided to design my display board off of a charge of the Dol Amroth knights through a valley into the open battle field. I modeled the clifftops to hold my Rangers of Gondor and then designed a charging layout which has Imrahil on horseback as the lead of the charge.

Some items of note is the display board grass, which was modelled off my actual models to make it look as if the grass on the models is actually part of the display, providing a more seamless design to the overall layout.

Here in my closeup of Imrahil you get an idea of the grass effect on the display board. Also you get a sense of the scope of the army with the additional knights behind Imrahil charging forward.

Here is another shot of the army from the side. It gives a bit of a closer view of the gorge that the army seems to be erupting from. Also you get additional ideas of how the grass on the model bases and display board flow together to provide a full battlefield.

Above the battlefield you get a glimpse of the Rangers of Morthond Vale, which act as my advance scouts, rangers and archery support. With their solid fight values of 4 and their ability to shoot with a 3+ I look toward them to quell many a charge from my enemies during the tournament.

Last through the gorge are my secret weapon. The elite Axemen of Lossarnach. These mighty warriors are great as they provide needed spear support for my Knights, but also can move forward and battle side by side with the knights bringing their axes into the fray as mighty 2-handed weapons.

Watch for a future update at the end of the month to detail my exploits during the tournament! If you are planning to attend I would love to hear what you are bringing, additionally, I look forward to comments and criticisms, so please let me know what you think of my army.

Tuesday, January 27, 2009

Review: Guardians of the Flame(The Heroes)

Well. A few weeks back I completed a review of the first three novels from the Guardians of the Flame series. See my original review here. I have more recently finally finished the next two novels from the same series dubbed 'The Heroes'. As I gave a review of the first part, I think it only fair to continue that trend and review each of the novels as I continue through these classic books.

The Heir Apparent: This novel takes off several years(?) after the conclusion of 'The Silver Crown' as Karl is now more than simply the head of the Bieme nation, but now is the Emperor of the entire Holton/Bieme area which has been renamed 'The Empire'. It is hard to understand how this occurred, but the assumption is that the warring nations came to a forced truce due to the involvement of Karl Cullinane and his Home warriors.

During this novel though the Heir, Jason Cullinane, is involved in his first actual fight and gets scared and runs. As he ran he feels a need to not return as he is concerned of being seen as a coward. His only way to rectify this situation is to eliminate the biggest threat he knows of, Arhmin, a Master Slaver which Jason's own father failed to kill. To this end he travels to Pandathaway and hires on as a 'slaver' with Arhmin as the Slavers try to set a trap for his own father who has left The Empire ona mission to distract the slavers from chasing after Jason.

This mission is the the Mellawei coast and the Sword which can protect its bearer from magic. The idea is that if the slavers know Karl is going for the sword, they will chase after him instead of looking for Jason giving the Empire and Home searchers time to find him.

The Warrior Lives: This is book 5 of the series and continues the story immediately after the conclusion of The Heir Apparent. During this story, it is unclear if the Hero, Karl Cullinane, has fallen or not as there are rumors that he still is around and has taken the fight straight to the slavers. The slaver guide is afraid of everything as they try to eliminate this new deadly threat, while Karl's son Jason, the Heir, and his friends embark on a quest to find the truth regarding karl and also bring Walter and Ahira back home.

Without giving away too much, the young Heir does find his friends and the truth about his father. Additionally, they encounter a monstrous beast of unknown origin which elludes to the next novel and the concerns of the creatures coming out of an area called Faerie.

Overall these are both good novels and is worth another read. I am glad I have tracked the series down as usual and look forward to the remaining books in the series.

Friday, January 23, 2009

AI: Aircraft Recovery

Recently I obtained 2 Orc Fightas and 2 Imperial Thunderbolts in a trade via bartertown and decided that I wanted to redo their paint jobs. Actually, only the Thunderbolts were painted, but the Fightas needed a little TLC due to shipping issues and so I decided to redo everything.

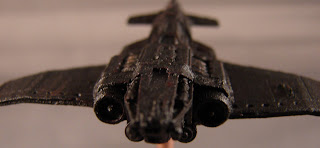
Above are shots of one of the Thunderbolts prior to any work being done.

As such, I really wanted to try out a technique I found on FTW about using liquid Gesso as a primer. Now the directions on FTW showed how it could be applied over existing paint, but I decided to attempt to strip the existing paint first instead. As this is my first time working with resin, I wasn't fully certain that my normal stripping methods would be safe for it. I decided to go ahead though and use some Simple Green, which in my experience seems to be the mildest of stripping agents.
After soaking in a bath of Simple Green for 1 hour I then used a Sonic Care toothbrush and lightly scrubbed away as much paint and primer as I could. As you can see, the results were very good, but there were still a number of areas that paint still clung to. I decided as the Resin seemed fine to go ahead and give the model another bath for another hour.


After the second bath I did the same process of scrubbing again and more paint did come off, but there was still a little residue. Also I noticed some blotchy patches of area that I think are from super glue that got smeared on the model during it's original assembly. Hopefully this will not be a problem after my primer goes on.


Well, I decided to move forward and try out the Gesso. I have never used Gesso before, but chose a Clear Gesso and added black acrylic paint to tint it. Benefit one was the Gesso in clear was $2 cheaper than the White or black versions. I also chose to glob in on as suggested in the end of the FTW article. Here are some shots after the Gesso was applied.


As you can see, I laid on on pretty think to make sure to get solid coverage. I was VERY hopeful that the Gesso would shrink up as it did in the original article. After 2 hours of drying time here is the final result.


So, it is clear that the Gesso shrunk up as expected. I see it appears a bit grainy which I don't know if is normal, but I think it is OK as when I paint the model I think that will get covered up and may help grab up the paint as it is applied to the model. I plan to try out the Gesso without stripping on my other Thunderbolt to then compare the two to see if there was really difference.

Have any of you all ever used Gesso yourself? I am curious what results you got and was the final result grainy similar to what I got? Let me know.

EDIT: I completed the Gesso on the other Thunderbolt. Can you tell the difference? It is the one on the right. It is a little darker, but coverage as a primer coat I think is acceptable.

Here are a couple closer shots. You can see some of the old red paint peeking through. Still I think these will look great once I get the Electric Blue paint I am planning for them.